cables/ropes
BDRS
BDRS Rope Tension Meter Manual
Ⅰ. Overview
1.1The main purpose and scope of application
The BDRS series cable tension meter is an on-line measurement of wire and cable, fiber and rope tension equipment, suitable for high-speed rail industry, power industry, communications industry, transportation industry, construction industry, playground, etc. involving wire rope tension measurement When used. Also applies to the major scientific research institutions, testing organizations and other occasions.
1.2Product Features
1.2.1 On-line measurement: When measuring rope, the rope does not need to be disassembled, can be measured on-line tension cable, real-time loading rope tension, can be observed online real-time tension.
1.2.2 portable: the instrument uses high-strength aluminum alloy structure, light weight, small size, easy to carry, measuring rope tension, one person can complete all operations.
1.2.3 easy to operate: the instrument loading mechanism with a lever structure, only need to push the instrument handle in the end can correctly measure the rope tension; easy to operate, a person in 30 seconds to complete a measurement.
1.2.4 instrument performance is stable, high precision, when the measured rope specifications and the wattage stored in the same number of rope, in the range can be measured within the measurement accuracy of up to 5%.
1.2.5 Instrument built-in three kinds of preset specifications of the rope, the measurement only need to select the appropriate rope number can be.
1.2.6 digital display force value, the instrument uses LCD display measurement force value, reading more convenient.
1.2.7 Three units of switching: the instrument can switch N, Kgf and Lbf three force values.
1.2.8 The instrument can store 383 sets of measurement data, and the saved data can be exported from the computer.
1.3varieties, Specifications
1.3.1 Copper strand tension meter specification table.
1.3.1.1 BDRS-A-5000G rope tension meter specifications are as follows:

1.3.1.2BDRS-B-5000G rope tension meter specifications are as follows:

1.3.1.3BDRS-C-5000G rope tension meter specifications are as follows:

1.3.2Steel wire rope tension meter specification table.
1.3.2.1BDRS-A-5000S rope tension meter specifications are as follows:

1.3.2.2BDRS-B-5000S rope tension meter specifications are as follows:

1.3.2.3BDRS-C-5000S rope tension meter specifications are as follows:

1.4Product Technical Parameters
1.4.1 Scoring value: 1N
1.4.2 Accuracy: ± 5%
1.4.3 Power supply: 7.2V Ni-MH battery pack
1.4.4 Charger: Input AC 100 ~ 240V 50Hz Output: DC 12V 500mA
1.4.5 Sampling rate: 10Hz
1.5 Composition and Significance.


Ⅱ.Structure of the product
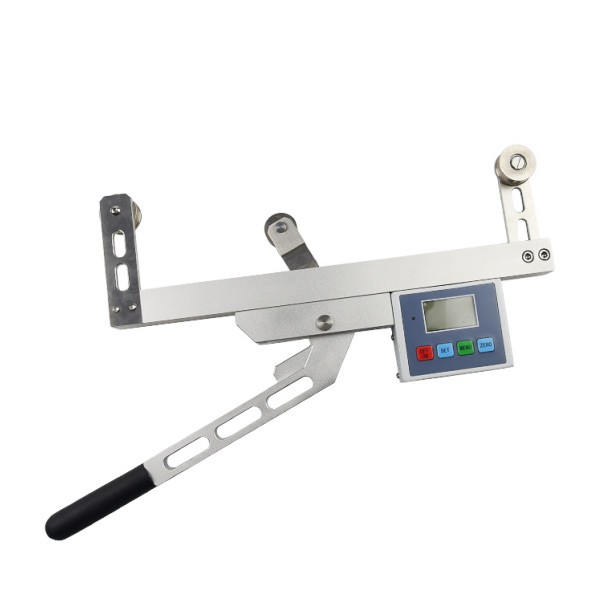
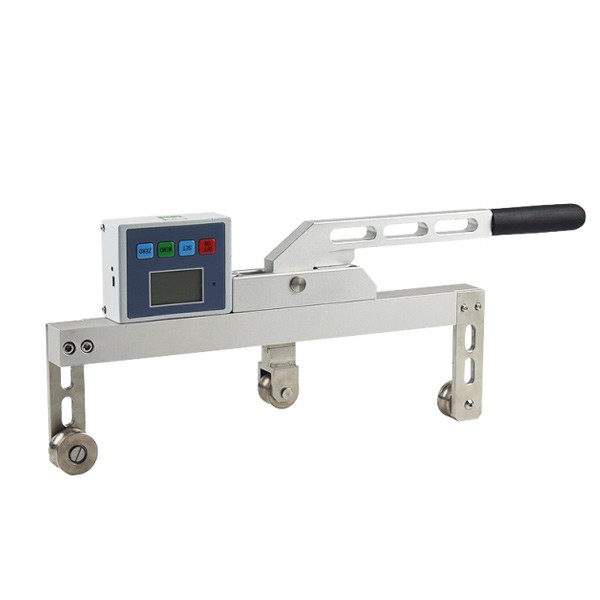
2.1Outlinestructure


2.2LCD screen function

2.2.1 Switch key: When this key is pressed, the power is turned on or off.
2.2.2 Setting key: The user can enter the setting interface through the key when measuring the interface, and press this key to save the data when setting the data.
2.2.3 Memo key: in the measurement interface to save the measurement data function; in the measurement interface, long press this button to view the saved data; enter the setup interface, with the up function.
2.2.4 zero key: when the interface is measured, the test value on this key screen will be reset to zero. When setting the data, press this key to return to the setting interface.
2.2.5 charging indicator: when the charging power is plugged in, the power supply is not fully displayed at the red light, and then the green light is displayed.
Ⅲ.Use and operation
3.1 Preparation and Inspection Before Use
3.1.1 Check the power, if insufficient, need to be recharged before use.
3.2 The use of the operation and instructions
3.2.1 Settings

3.2.2 Unit Setting: After starting up, enter measurement interface, press "SET" key to enter setting interface, press "SET" key again to enter unit setting, press "MEMO" key to select unit, save the required unit , Press "SET" key to save and exit to setting interface. As shown below:

3.2.3 Peak Setting: Press "MEMO" to select "PEAK" after the last step is completed. Press "MEMO" to enter "PEAK" after entering. There is no such character to display (indicating real-time load value mode) Switch between modes, select the desired mode, then press "SET" key to save and enter the next function setting, as shown below:

3.2.4 Upper limit setting: press "SET" key to enter the upper limit setting, press "ZERO" key and "MEMO" key to digitally adjust, select the desired value, then press "SET" key to save and enter the next function Settings, as shown below:

3.2.5 Lower limit value setting: Press "SET" key to enter the lower limit value setting, press "ZERO" key and "MEMO" key to digitally adjust, select the desired value, then press "SET" key to save and go to the next function Set.
3.2.6 Peak Preservation Value: In peak mode, when the current value is less than this value, the peak value will not be saved. Press "SET" key to enter the peak minimum saving setting, press "ZERO" key and "MEMO" key to digitally adjust, select the desired value, then press "SET" key to save and enter the next function setting.
3.2.7 Automatic shutdown time setting: can be set 1 minute to 9999 minutes automatically shut down, you can also set "0000" does not shut down. The default setting is 30 minutes. Press "SET" key to enter auto power off time setting. Press "ZERO" key and "MEMO" key to digitally adjust, select the desired value, then press "SET" key to save and enter the next function setting.
3.2.8 Selection of gear number: Press "SET" key to enter the "gear selection" setting, press "MEMO" to select the desired gear, press "SET" to save, the instrument will automatically shut down and restart.
3.2.9 Gravitational Acceleration Setting: The user can set the gravitational acceleration value according to the local area. The default value is 9.800.
3.2.10 Backlight Function Setting: Under this setting item, use "MEMO" key to select, if choose "YES" to turn on the backlight function, select "NO" to turn off the backlight, select "SET" key to save and return To set the project interface.
3.2.11 Restore Factory Settings Function: Under this setting item, press "SET" button to restore the factory settings, the machine shutdown. If you use the machine to reboot.
3.3Test
3.3.1 Turn on the switch.
3.3.2 According to the measured diameter of the rope, select the number file stalls. (Refer to the above specification table)
3.3.3 The test rope through the activities of the wheel, two fixed wheel and rope in full contact, as shown below:

3.3.4 Press the rope to be tested on the wheel, tighten the handle, the value shown is the actual tension force of the measured rope.
3.4 Save the data export
3.4.1 Save the data
Press the "MEMO" key data will be stored up, when no data is saved, there is no display on the display. MEM is displayed when data is saved. Long press the "MEMO" button to view the save data, "MEM" flashes, the number of saved appears first, 2 seconds after the save value automatically appears. Press the "ZERO" key to exit the viewing interface directly into the test. Data can also be entered into the computer for analysis and processing. The machine can store 383 sets of data.
When more than 383 sets of data, the subsequent data will not be saved.
Ⅳ, Maintenance and warranty
4.1 Routine Maintenance
4.1.1 Please use the matching charger to charge, otherwise it will cause circuit failure, or even cause a fire.
4.1.2 Do not use any power source other than the rated voltage of the charger. Otherwise, it may cause electric shock or fire.
4.1.3 Do not remove or insert the plug with wet hands, otherwise it may cause electric shock.
4.1.4 Do not pull the charger's power cord to unplug the plug, in order to avoid electric shocks were torn off.
4.1.5 Please use a soft cloth to clean the machine. Soak the cloth in water with detergent and wring it dry before removing dust and dirt.
Caution: Do not use volatile chemicals to clean the unit (such as volatile solvents, thinners, alcohol, etc.)
4.2Using Maintenance
4.2.1 Do not exceed the maximum range to use the instrument. Failure to do so may result in damage to the sensor or even an accident.
4.2.2 When the test value exceeds the range, the buzzer beeps continuously. In this case, please quickly release the applied load or reduce the load.
4.3 long-term deactivation of the maintenance and repair
4.3.1 Please use and store within the specified temperature and humidity range, or it may cause equipment failure.
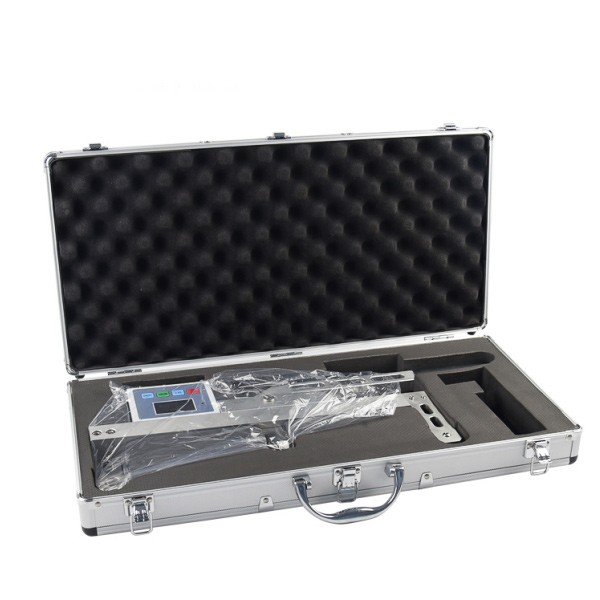
Ⅴ.Packing List
1 | Rope tension meter | 1 |
2 | 12V Charger | 1 |
3 | Manual | 1 |
4 | Warranty Card | 1 |
5 | Desiccant | 1 |
6 | Check Certificate | 1 |
7 | USB cable | 1 |
Sorted by industry
News
Contact Us
Contact: China tension meter manufacturer BETTEN Technology
Phone: 13911001672
Tel: +86-24-24754482
E-mail: info@betten-tech.com
Add: Shenyang Shenbei International Science and Technology Cooperation Industrial Park